How to Make a Paper Boat: Easy Step-by-Step Guide
Making a paper boat is a classic and entertaining activity for kids and adults alike. It's a simple and creative way to spend time and learn basic origami techniques. What's more, making a paper boat is not only an enjoyable pastime, but it also teaches patience and focus, making it an excellent educational activity.
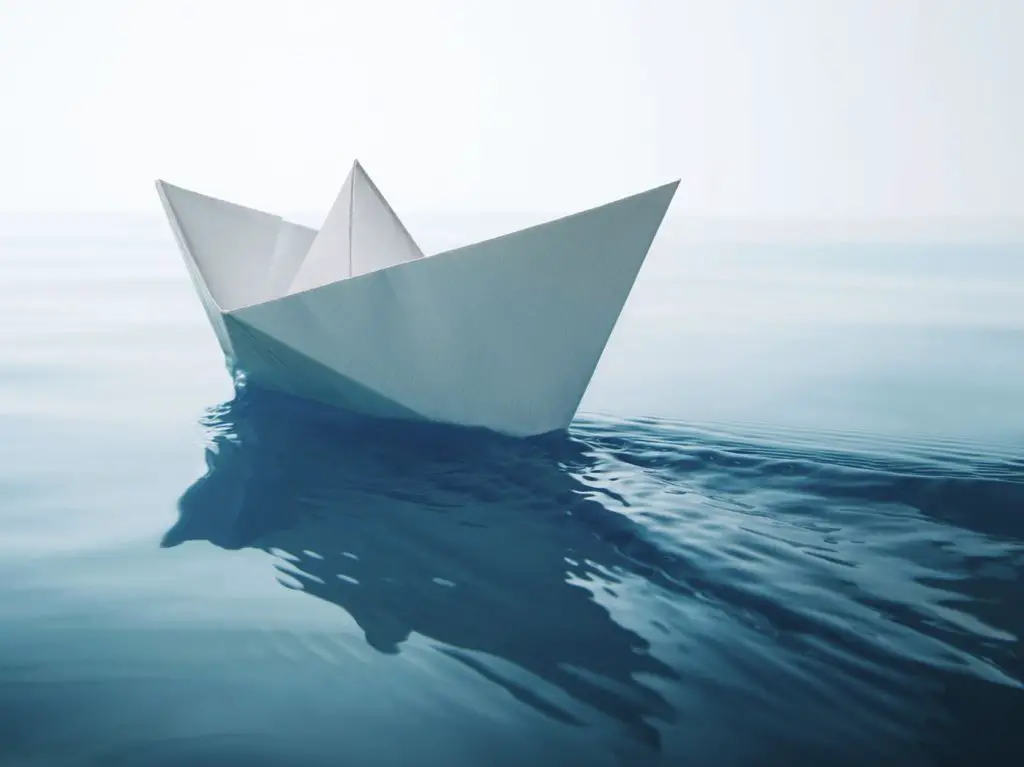
In this article, you'll learn how to make a paper boat using a step-by-step tutorial. This guide will cover everything from selecting the appropriate materials to folding and decorating your paper boat, ensuring that it's both aesthetically pleasing and capable of floating. By carefully following the instructions provided, you'll be able to create a variety of boat shapes and sizes to suit your preferences.
Key Takeaways
- Learn how to make a versatile and entertaining paper boat with a clear, step-by-step tutorial.
- Discover creative ways to decorate your boat and how to make boats with different shapes and sizes.
- Explore educational activities related to paper boat making to enhance the learning experience.
Materials Needed
Choosing Your Paper
When making a paper boat, the first decision to make is the type of paper to use. While traditional origami paper can be used, it's not a requirement. A simple square sheet of paper will work well. If you're starting with a rectangular sheet, simply trim it down to a square before proceeding. Construction paper, card stock, and even waxed paper can be utilized for this project. For a more durable boat, consider using aluminum foil as an alternative material.
Preparing Additional Supplies
Aside from the paper, you can gather a few additional items to enhance your paper boat crafting experience. If you're using plain white paper, consider adding some colors to your boat with crayons, markers, or colored pencils. Younger children might enjoy decorating their boats with stickers or other craft supplies.
When selecting your materials, keep in mind the end goal of your paper craft. If you plan to float your boat on water, avoid materials that are too heavy or prone to absorbing water. Additionally, for increased stability, consider using heavier papers like card stock or waxed paper.
With the right materials, making a paper boat can be an enjoyable and educational activity. Remember to experiment with different types of paper and decorations to create unique and personalized boats.
Basic Paper Folding Techniques
Making Creases
Before folding a paper boat, it is essential to learn how to make creases properly. Creases are the foundation for any paper folding project. To create a strong and precise crease, first, align the edges of the paper and hold them in place using the thumb and index finger of one hand. Gently press down the folded edge with the other hand's thumb, moving from one end to the other, making sure it is even and firmly pressed. The more accurate the creases, the better the end result will be.
Basic Folds
There are a few basic folds that one must master to make a paper boat. Here's a list of folds used in creating a paper boat:
- Valley fold: Fold the paper towards itself, creating a downward crease.
- Mountain fold: Fold the paper away from itself, resulting in an upward crease.
- Triangle fold: Create a triangle shape by folding one edge of the paper to meet the other edge.
- Diamond fold: Form a diamond by opening up the bottom of a previously made triangle, aligning the bottom corners of the triangle, and folding them over each other.
These basic folds play a crucial role in creating a well-executed paper boat that not only looks good but also floats stably on water.
Unfolding Tips
As important as folding techniques, unfolding tips should be considered to ensure a successful paper boat. When unfolding the paper, be cautious not to tear or wrinkle it, as this can impact the boat's balance and appearance. One should be gentle when opening flaps, using fingertips to apply_even pressure on both sides to maintain the paper's overall structural integrity.
Utilize the basic folding techniques, like making precise creases and understanding the essential folds, combined with careful unfolding to create a perfectly-shaped paper boat. Remember, practice makes perfect, so don't be discouraged if the first few attempts are not perfect—keep folding, and soon creating a paper boat will become second nature.
Step-by-Step Guide to Making a Paper Boat
Creating the Base Shape
Begin by selecting a square sheet of paper, preferably origami paper. Place the paper in front of you with one corner facing upwards, forming a diamond shape. Fold the paper in half diagonally, so that the top corner meets the bottom corner, creating a triangle shape. Make sure the edges align perfectly and press firmly to create a sharp crease.
Forming the Boat
Now, grab the triangle and rotate it 45 degrees. Gently open up the bottom of the triangle and pull the paper apart until it pops into a square shape. Make sure the bottom corners of the triangle overlap each other, forming the bottom corner of the new diamond shape. Next, pick up the folded piece of paper and at the top point, pull apart the two sides. As you pull it apart, it should open into a boat shape. Adjust the paper as needed to make sure it's boat-shaped and pinch along the bottom edges to create a fold on each side.
Adding the Mast and Sail
To complete your paper boat, consider adding a mast and sail for added flair. With a separate piece of paper, cut a smaller square and fold it diagonally to create a triangle. This will serve as the sail. For the mast, use a thin wooden dowel or a straight piece of string and insert it through a small hole in the center of the sail. Attach the other end of the mast to the bottom center of the boat using glue or tape.
Your paper boat is now complete. Follow the above instructions to create more paper boats and enjoy your new fleet!
Decorating Your Paper Boat
Coloring and Customization
Before assembling your paper boat, it's a great idea to add some personal touches. Crayons, markers, and colored pencils can be used to create unique designs on your boat. You can also print coloring pages with different patterns or themes and use them as templates for your boat.
To further customize your paper boat, consider using stickers or other decorative items. Be creative and think of ways to make your boat stand out. For a more detailed guide on decoration techniques, refer to this video tutorial.
Waterproofing Considerations
When decorating, it's important to consider waterproofing as well. After all, a paper boat must withstand water. Common waterproof materials include clear tape, wax paper, or even a layer of wax from a candle.
Here's a brief list of materials that can be used to waterproof your paper boat:
- Clear tape
- Wax paper
- Candle wax
- Waterproof spray
Remember to apply these waterproofing materials as an extra layer of protection after you've finished decorating your boat. This will help ensure your boat stays afloat and retains its colors and designs.
By following these decorating and waterproofing tips, your paper boat will not only look visually appealing, but also be ready for its maiden voyage.
Making Different Shapes and Sizes of Boats
Altering Dimensions for Variability
In order to create different shapes and sizes of paper boats, you can experiment with the size of the paper itself. A larger paper size will result in a larger boat, while smaller paper will create a smaller boat. Additionally, the paper shape can be altered for variability. For example, you can use a square or a rectangular sheet, which will result in slightly different boat shapes.
To begin, choose a paper size appropriate for your desired boat size. Here are some suggestions for paper size and corresponding boat shapes:
- Square paper (e.g. 20cm x 20cm, 30cm x 30cm): Traditional boat shape
- Rectangular paper (e.g. 20cm x 40cm, 30cm x 60cm): Longer, narrower boat shape
Experiment with folding techniques that involve triangles, diamonds, and other shapes. For instance, folding a rectangular sheet of paper in half, followed by folding the corners down into triangular shapes will eventually result in a boat shape. Such techniques can help create various boat styles and shapes.
Advanced Origami Boats
For those interested in trying more complex boat designs, advanced origami techniques can be used to create a variety of intricate boat shapes. Some examples include:
- Double-layered boats: These boats can be made by folding the paper in a way that creates two layers, adding stability and a unique appearance to the boat.
- Boats with sails: Create boats with sails by folding additional paper into triangular shapes and attaching them to the boat's top.
- Multi-hulled boats: Construct multi-hulled boats, such as catamarans or trimarans, by folding multiple boat shapes and connecting them together.
In summary, by varying the paper size, shape, and folding techniques, you can create an array of different boat shapes and sizes. Experiment with square and rectangular sheets of paper, and try advanced origami techniques to take your paper boat-making skills to the next level.
Ensuring Your Boat Floats
The Science of Floating
To ensure that your paper boat floats, it's essential to understand the basic science behind the floating phenomenon. When an object is placed in water, it displaces an amount of liquid equal to its own weight, in accordance with Archimedes' principle. If the displaced water weighs more than the object, the object will float as it experiences an upward buoyant force.
In the case of a paper boat, it is important to create a design that will displace enough water to counteract its weight. Key factors that affect the boat's ability to float include:
- Surface area: A wider base increases the surface area in contact with the water, which helps increase water displacement and stability.
- Weight distribution: Distributing the weight evenly across the base will help the boat remain stable and balanced.
- V-shape: Origami paper boats usually have a V-shaped hull, which helps them cut through the water and maintain stability while moving.
Testing and Troubleshooting
Once you have crafted your paper boat, it's crucial to test and troubleshoot its ability to float. Some key steps include:
- Make sure the boat's surface area is wide enough and the shape is correct, as shown in this tutorial.
- Test your boat in calm water conditions, avoiding windy areas or strong currents that can tip the boat over.
- If the boat is sinking, you may need to adjust the shape and make sure all folds are properly made.
- If the boat is unstable, check the weight distribution and ensure that the sides are symmetrical.
- To enhance your boat's stability and buoyancy, you can add waterproof material like tape or a layer of wax on the paper.
Testing and troubleshooting are essential steps in achieving a boat that floats and is stable in water. Once you are confident in your paper boat's ability to float, you can enjoy watching it sail across the water surface or even set up races with your friends.
Educational Resources and Activities
Incorporating Paper Boats into Lessons
Teaching the art of paper folding, also known as origami, is a wonderful way for teachers and parents to engage children in creative and educational activities. Paper boats are a perfect example of an easy-to-learn origami craft that can be incorporated into various subjects such as history, geography, and physics. One of the main advantages of this activity is that it only requires a single piece of paper - making it a cost-effective and easily accessible craft.
To incorporate paper boats into lessons, teachers can use Japanese origami as a starting point for discussing the history and cultural significance behind this art form. In geography, they can explore the role of boats and water travel in different countries. For physics, young learners can experiment with the buoyancy of their paper boats, demonstrating principles like Archimedes' principle.
Some useful resources for teaching origami paper folding include:
- Online tutorials: Websites like wikiHow and YouTube channels offer step-by-step guides on how to fold a paper boat.
- Books: Origami-themed books are available at local libraries or bookstores, which can provide inspiration for both children and adults.
- Workshops: Some museums, cultural centers, and schools may offer workshops on origami paper folding, where children can learn from a knowledgeable instructor.
Craft Ideas for Parents and Teachers
When it comes to incorporating paper boats into kids' craft activities, the options are endless. Here are a few Summer-themed ideas to consider:
- Nautical-themed parties: Use paper boats as decorations or centerpieces at a kids' summer party, encouraging the children to race their boats in a kiddie pool or a shallow water area.
- Storytelling sessions: Incorporate paper boats into your storytelling sessions, using them as props to act out scenes from classic tales like "The Owl and the Pussycat" or "Paddle-to-the-Sea."
- Art projects: Encourage your kids to decorate their paper boats with paint, glitter, or colored pencils, making each boat unique and personal.
- Races and competitions: Organize paper boat races, offering small prizes or certificates of achievement to the fastest boats.
Remember, involving the children in the creative process helps to foster a sense of accomplishment and reinforces the educational benefits of these activities. So, whether you're a teacher, a parent, or simply a fan of Japanese origami craft, there are countless ways to enjoy and share the fun of making paper boats with the younger generation.
Frequently Asked Questions
What are the steps to create a floating paper boat?
To create a floating paper boat, first, fold a square piece of paper diagonally in half to form a triangle. Then, fold the bottom corners of the triangle towards the center, forming a diamond shape. Open up the bottom of the diamond and shape it into a square. Gently pull the top flaps apart to form the boat shape. For detailed steps, visit this tutorial.
Can you show how to make a paper boat with a sail?
Yes, to make a paper boat with a sail, start by following the steps for a basic paper boat. Then, create a small sail out of a rectangle of paper. Finally, attach the sail to the boat using a small piece of tape or glue. You can watch this video for a visual guide.
What is the ideal paper type for constructing origami boats?
The ideal paper type for constructing origami boats would be a lightweight yet sturdy paper, such as origami paper or regular printer paper. Keep in mind that heavy paper may not fold as easily, and thin paper may not hold its shape well. Visit this guide for tips on choosing the right paper.
How can I make a simple paper boat for children?
For children, start with a square piece of paper and follow the same steps mentioned above for creating a floating paper boat. Make sure an adult is present to supervise and help children with folding. Visit this tutorial for an easy-to-follow guide specifically designed for children.
Are there any specific designs that help paper boats float better?
Yes, specific designs can help paper boats float better, such as wider and more stable bases. Experimenting with different folding techniques and boat shapes can lead to more efficient designs. Refer to this step-by-step guide for more ideas on paper boat designs.
Could you provide a guide on making a paper boat using square paper?
Certainly. To make a paper boat using square paper, begin by folding the paper diagonally in half to form a triangle. Then, fold the bottom corners towards the center to create a diamond shape. Open the bottom of the diamond and re-shape it into a square. Gently pull the top flaps apart to form the boat shape. For a detailed guide, check out this tutorial.

Charlie is Editor-in-Chief of Sea Magazine